In my previous blog posts Monitoring NetApp Clustered Data ONTAP using Unified Manager 6.0 & NetApp Workflow Automation for VMware - Setup & Configuration I have shared the steps to setup UM 6.0 and WFA 2.1 which will be used as the building blocks for the automation solutions for NetApp & VMware.
In this blog post we will take a step further and setup the internal vCenter Orchestrator (vCO) instance that is available in vCloud Automation Center (vCAC) 6.0.1.
Since there is enough documentation available about setting vCAC I have not covered the installation and setup steps for vCAC in this blog post. I will start with setting up vCO which is already available within the vCAC appliance. For a better understaning I have divided this topic into two parts.
Integrate vCO with NetApp WFA & vCAC - Part 1 – Here I will discuss the steps required to configure vCO.
Integrate vCO with NetApp WFA & vCAC - Part 2 – Here I will cover the steps required to use the vCO (NetApp) workflows in vCAC.
Let me start by thanking Jack McLeod & Jeremy Goodrum who have helped me in setting up vCO.
Setup vCenter Orchestrator with NetApp WFA & VMware vCAC
Start the vCenter Orchestrator server – An internal instance of vCO is already available within the vCAC appliance however the vCO service does not start by default when the appliance is started. To start the service you have to login to vCO appliance using VMRC and root/password credentials for the appliance.
Use the following command to start the vCO service
# service vco-configurator status
Status-ing tcServer
Instance name: configuration
Runtime version: 7.0.35.B.RELEASE
tc Runtime Base: /var/lib/vco/configuration
Status: NOT RUNNING
# service vco-configurator start
Starting tcServer
Using CATALINA_BASE: /var/lib/vco/configuration
Using CATALINA_HOME: /usr/local/tcserver/vfabric-tc-server-standard/tomcat-7.0.35.B.RELEASE
Using CATALINA_TMPDIR: /var/lib/vco/configuration/temp
Using JRE_HOME: /usr/java/jre-vmware
Using CLASSPATH: /usr/local/tcserver/vfabric-tc-server-standard/tomcat-7.0.35.B.RELEASE/bin/bootstrap.jar:/usr/local/tcserver/vfabric-tc-server-standard/tomcat-7.0.35.B.RELEASE/bin/tomcat-juli.jar
Using CATALINA_PID: /var/lib/vco/configuration/logs/tcserver.pid
Status: RUNNING as PID=16791
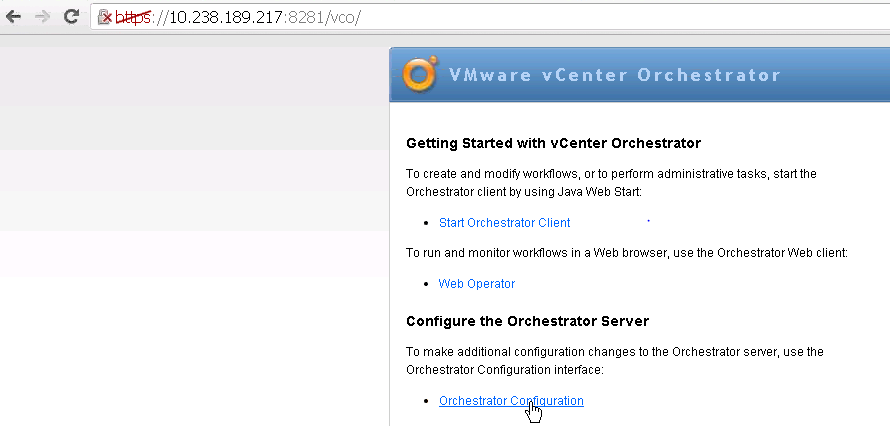
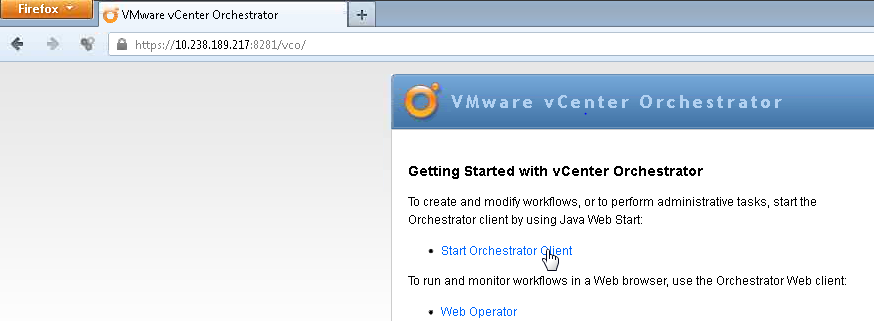
Since my vCAC and vCO server have the same IP, I connect to https://vcac.nb-cloud.com:8281/vco/ and click on Orchestrator Configuration to launch the VMware vCenter Orchestrator Configuration page.
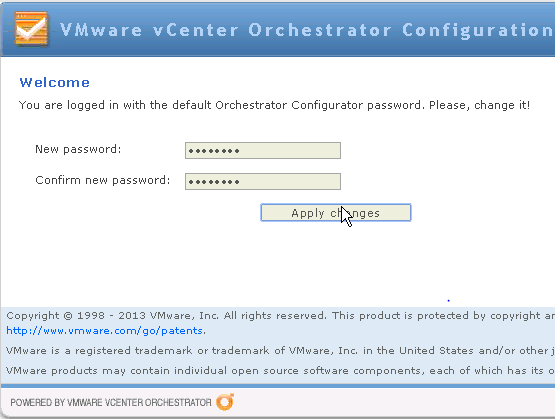
Login using the default credentials where the username and password is vmware

You will be prompted to change the password during the first login
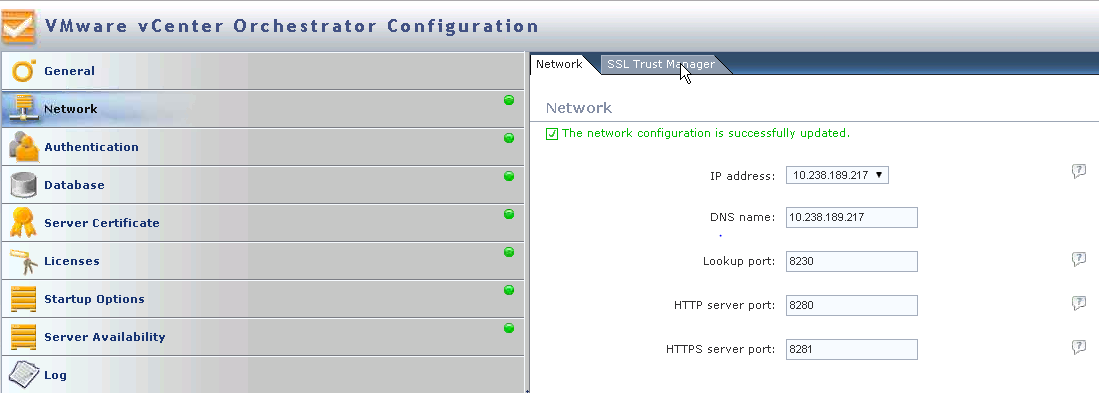
On logging into vCenter Orchestrator Configuration navigate to Network > Network and make sure that the vCAC appliance IP is selected. By default it is set to 0.0.0.0 and if this is not changed you may face issues while adding vCO endpoint in vCAC.
Click on SSL Trust Manager tab, you have to import the SSL certificates for vCenter Server and NetApp Workflow Automation Server (WFA). For NetApp WFA, enter the IP or FQDN of the WFA server and click on import.
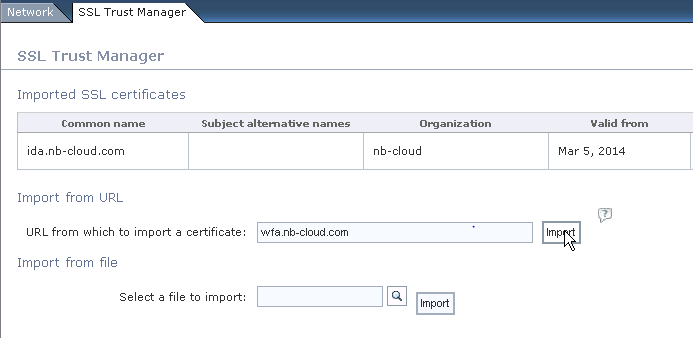
Click on Import
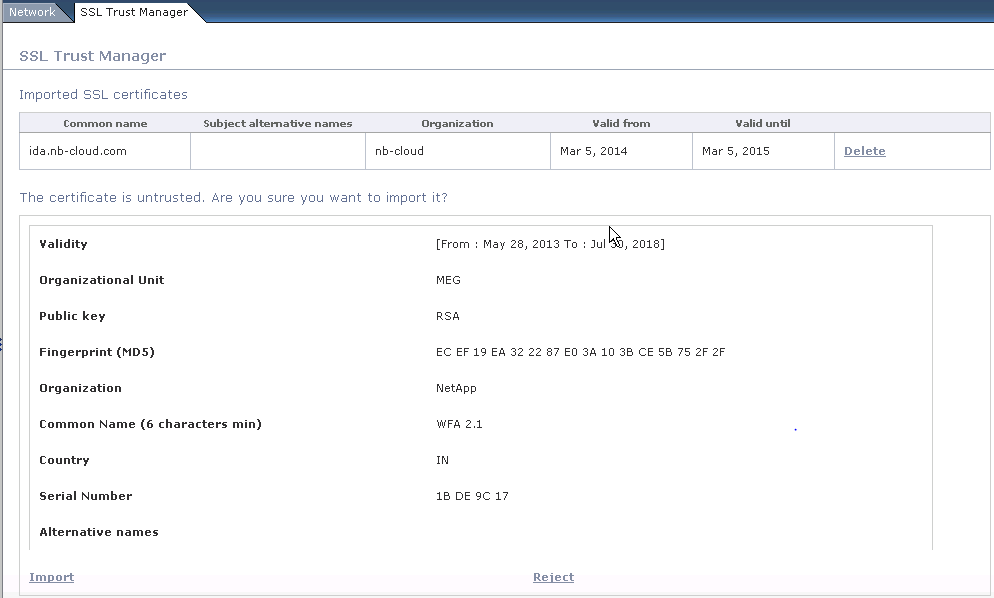
Repeat the same steps for vCenter server, where you have to provide the IP or FQDN of the vCenter server and click on import.
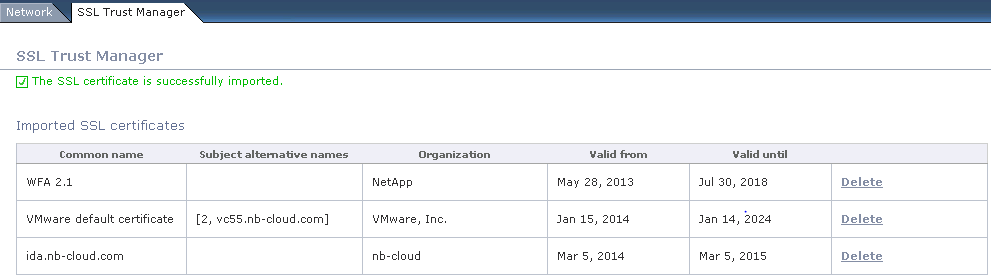
To confirm that the certificates have been imported, make sure that you can see the WFA & vCenter entries in the SSL Trust Manager.
Navigate to Plugins tab and make sure that the following plugins are installed.
- HTTP-REST 1.0.3.337
- vCAC 6.0.0.29
- vCenter Server 5.5.0.331
- vCO Configuration 5.5.0.142
With vCAC 6.x the above plugins are installed automatically and I didn’t have to install additional plugins.
Now that you have completed the Orchestrator Configuration, let’s start the Orchestrator Client. To launch the client connect to https://vcac.nb-cloud.com:8281/vco/ and click on Start Orchestrator Client, Java is required to launch this client.
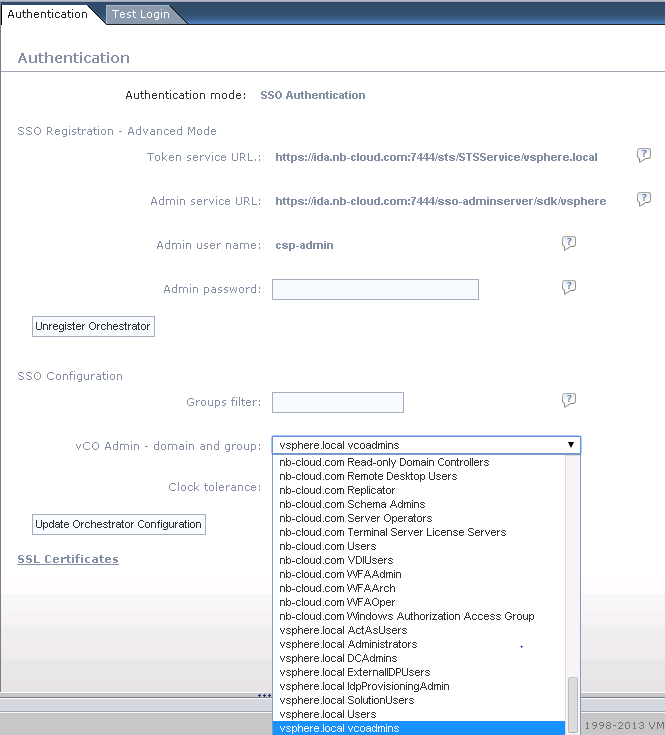
Logging in using the AD user account will fail and you have to use the default SSO user account i.e. administrator@vsphere.local to login to the client.

Note that you can change the entitlement from the Authentication tab in vCenter Orchestrator Configuration. However for this demo I am using the default SSO login hence I didn’t make any changes here.
Once you are logged into the vCenter Orchestrator client, you have to first import the NetApp WFA package by using the Import package wizard from the Run mode. To access this package download and extract the OnCommand Workflow Automation package v2.1.1.zip file available at https://communities.netapp.com/docs/DOC-32111. There is also any excellent vide by Jeremy which explains how vCO and NetApp WFA are integrated.
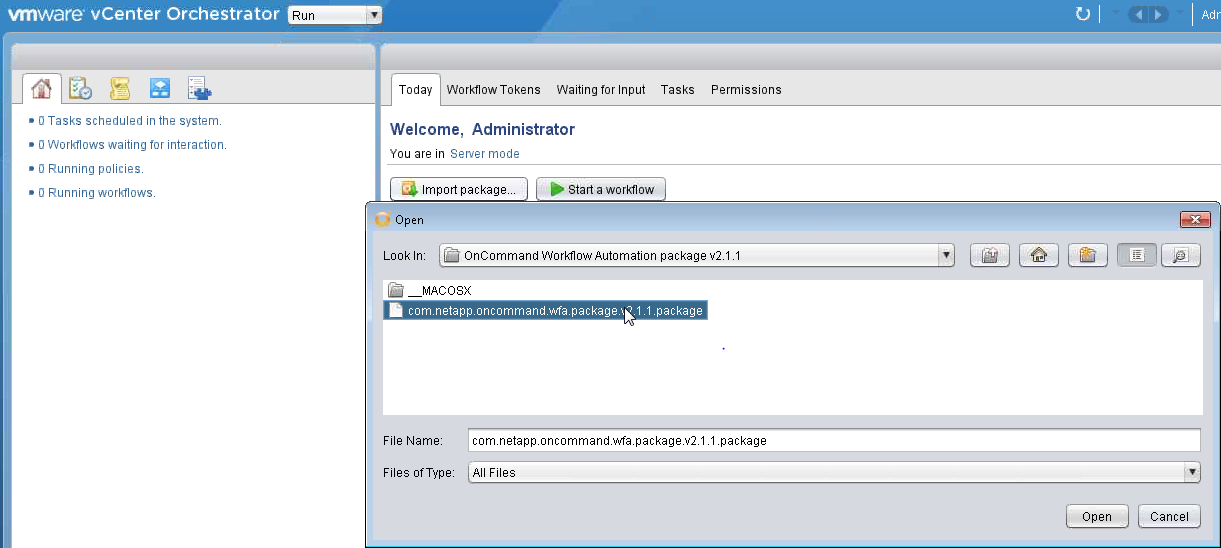
Make sure to import and trust the certificate.

Select the packages that you want to install, I chose all of them.

Once the package is successfully imported you will find the NetApp folder available in Settings. You have to navigate to Administrator > NetApp > OnCommand WFA > NetApp WFA User Configuration and click on Edit (marker icon) to input the attributes.
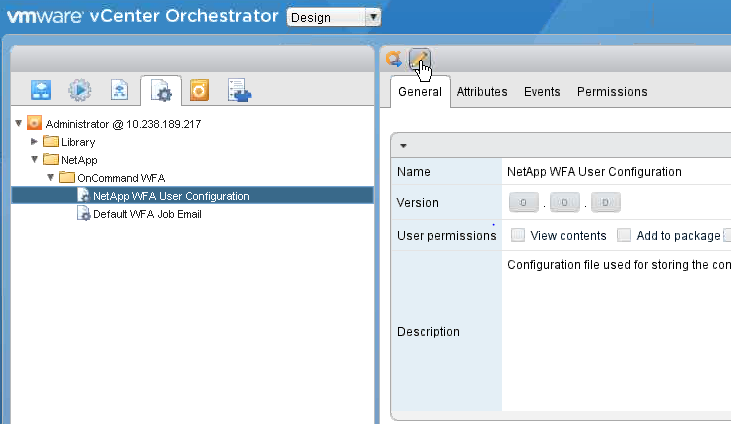
Provide the following details
- wfa-username – This is the user account that was specified while installing WFA. Alternatively you may type any other username with admin privileges in NetApp WFA.
- wfa-password – This is the password for the above user account
- wfa-hostname – Specify the IP or FQDN of the WFA server.

Make sure that vCO can communicate with WFA by using the Get WFA Workflow Inputs task. For more information about how to use this task, please go through the video about How-to Video: Using the OnCommand Workflow Automation package for vCenter Orchestrator.
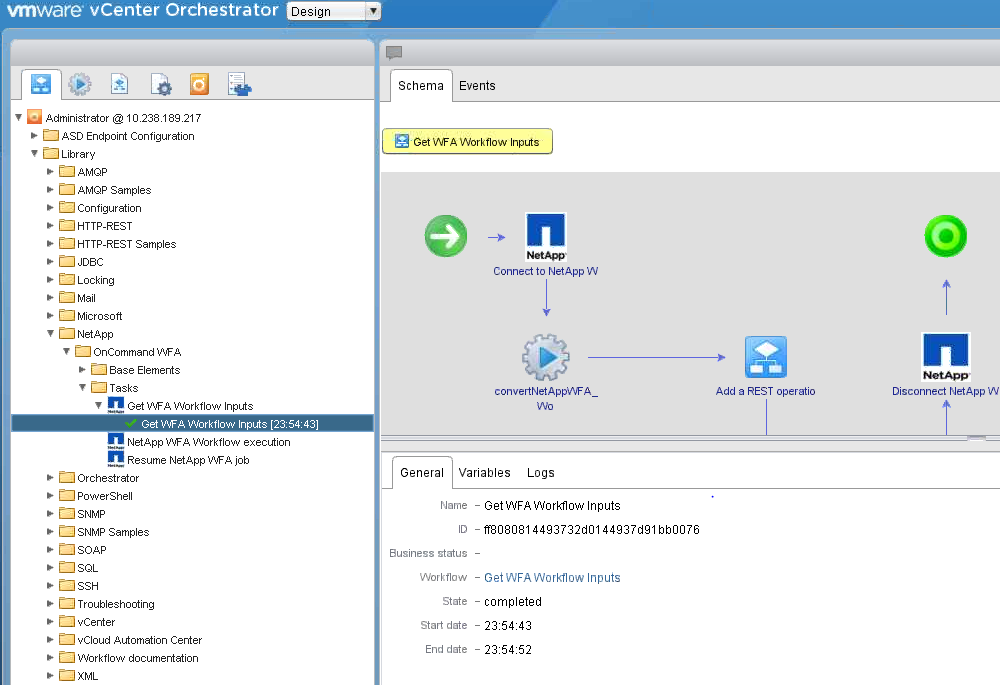
The same video How-to Video: Using the OnCommand Workflow Automation package for vCenter Orchestrator also provides information about how you can create your first workflow. In my case since I already have workflows available, I had to import them in vCO.
You can store the NetApp specific workflows in a new folder, here I have created a NetApp folder to store all workflows specific to NetApp Storage. Navigate to Workflow > Right client Administrator > click on Add folder.

To import workflows, right click on the NetApp folder created in previous step and click Import workflow.
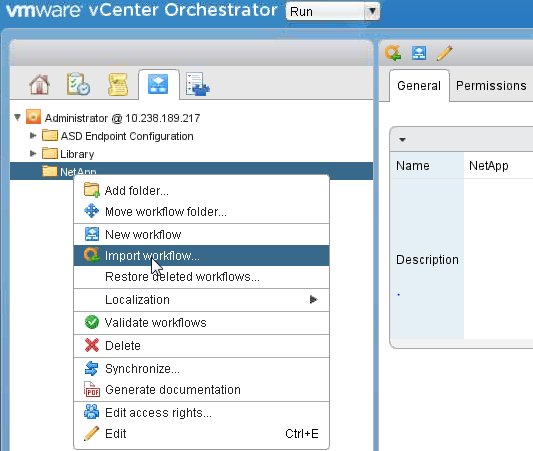
Select the workflow and click on Open to import the workflow.
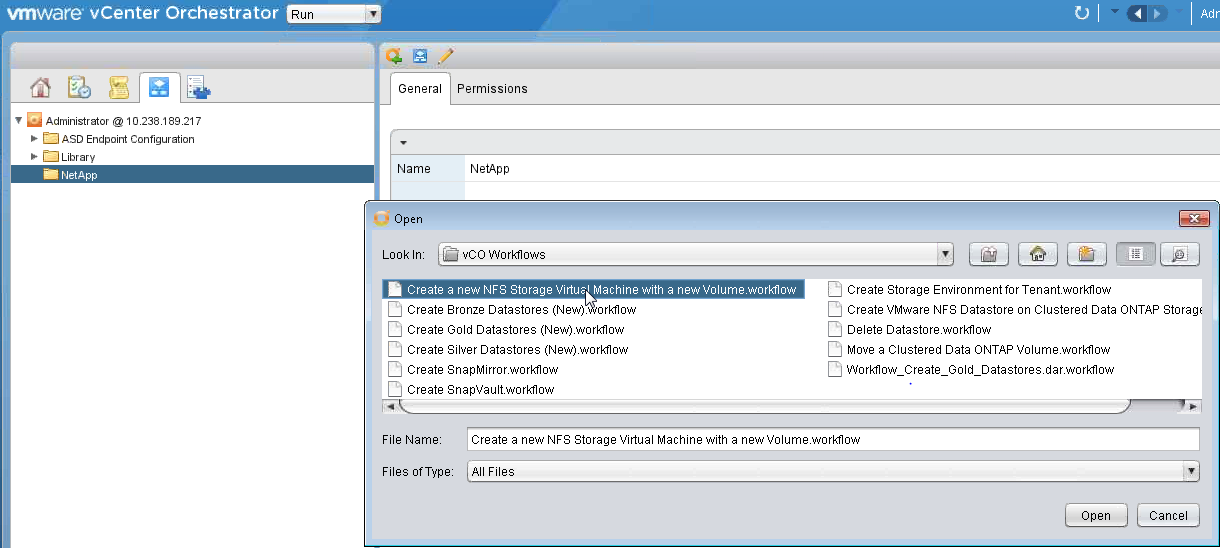
I have now imported all the NetApp Workflows in vCO.

With this you are ready to use these workflows in vCAC as Service Blueprints. I will discuss this is more details in my next blog post. I hope that the information in this blog post was useful and please leave a comment and share your feedback.