Showing posts with label netapp 7 mode. Show all posts

Friday, February 14, 2014

Provision NFS/VMFS Datastores using NetApp Virtual Storage Console ! Get-Smart !!

Welcome: To stay updated with all my Blog posts follow me on Twitter @arunpande !

In my previous blog post “Do you use NetApp Virtual Storage Console for vSphere Infrastructure?” I have provided some details about how NetApp VSC can help vSphere administrators to perform Storage management tasks from vCenter. In this blog post I will describe how easy it is to provision new VMFS/NFS datastores on the vSphere hosts using NetApp Virtual Storage Console plugin for VMware vCenter.  Using NetApp VSC you can provision VMFS/NFS datastores end-to-end i.e. on the Storage Controller and also on the ESXi hosts using a single workflow.
How does this help vSphere & Storage Admins?
  • With a single workflow you can complete the provisioning faster because now as vSphere Admins you don’t have to wait for Storage Admin to provision and present the LUNs to the ESXi hosts or create NFS volumes.
  • Using a single provisioning workflow you can provision VMFS/NFS datastores to all the ESXi hosts in a cluster.
  • While creating the NFS exports on the Storage the export policy and rule is created using the best practices of NetApp NFS and vSphere.
  • While creating FC & iSCSI LUNs, Igroups are created automatically and the WWPN or IQN of the ESXi hosts is added automatically, resulting in reduced human error.
  • It’s not limited only to provisioning new VMFS/NFS datastores, using VSC you can also mount existing datastores.
Demo – Provisioning new NFS volume
In this demo I will try to provision an NFS volume on all ESXi hosts in a cluster.
To provision NFS datastores on all the ESXi hosts in the cluster, right click on the Cluster > NetApp > Provisioning and Cloning > Provision Datastore
Select the vFiler (for 7 Mode) & Cluster (for Clustered Data ONTAP) from the Target Storage Controller list.
 
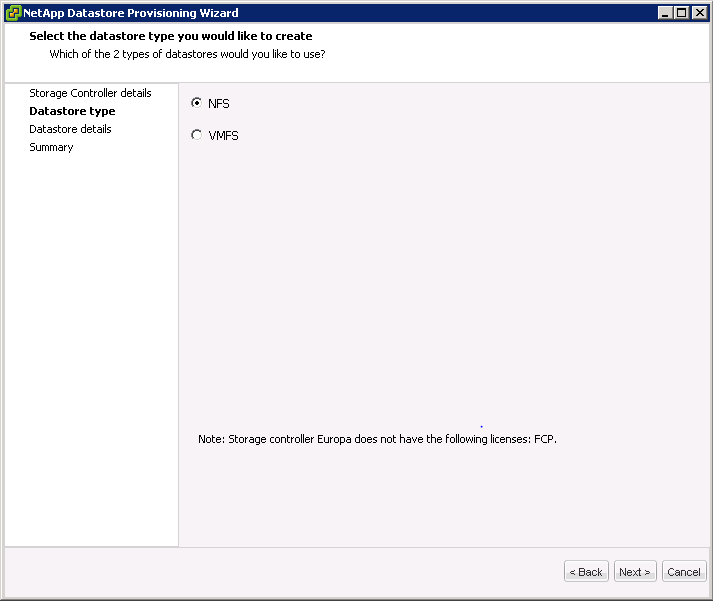
Select the type of datastore that you want to provision
 

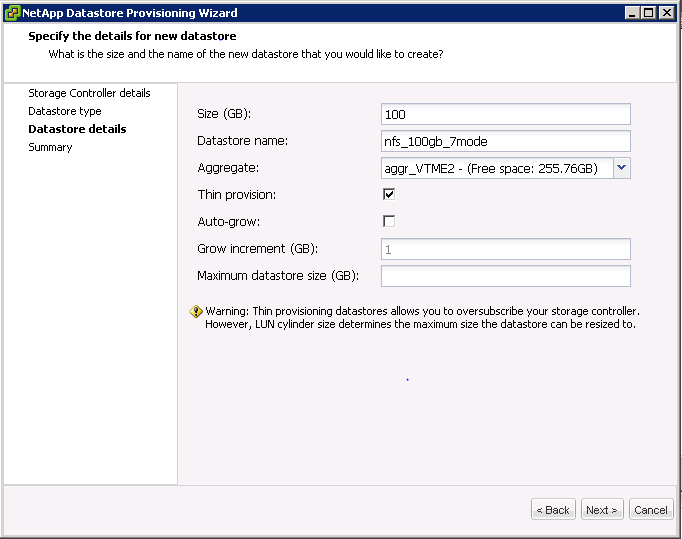
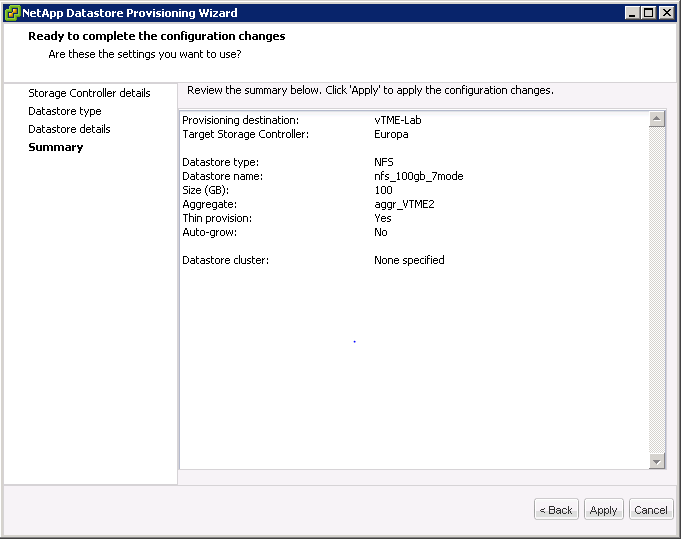
While creating a NFS volume, you may choose any available Aggregate on the controller that meets your requirements.  You have to specify the size, datastore name and also check Thin Provision if you want to thin provision volumes. Alternatively you may also check the Auto-grow option for the Thin Provisioned volumes.
 
Review the details and click Apply to create the NFS datastore
 
While the datastore is being created, monitor the tasks and events tab and you will find that the volume was provisioned on the NetApp storage and mounted to the ESXi hosts in the cluster. In this example I have two ESXi hosts in the cluster and the volume gets mounted to the ESXi hosts automatically. VSC has automatically created the following tasks on the ESXi hosts in the cluster. Doesn’t this help? especially if you have more than 8 ESXi hosts in the cluster.
 
Demo – Provisioning new VMFS volume
In this demo I will try to provision an VMFS volume on all ESXi hosts in a cluster.
To provision VMFS datastores on all the ESXi hosts in the cluster, right click on the Cluster > NetApp > Provisioning and Cloning > Provision Datastore
Select the vFiler (for 7 Mode) & Cluster (for Clustered Data ONTAP) from the Target Storage Controller list. If you select Clustered Data ONTAP, you would also get an option to select the available Vserver from this storage.
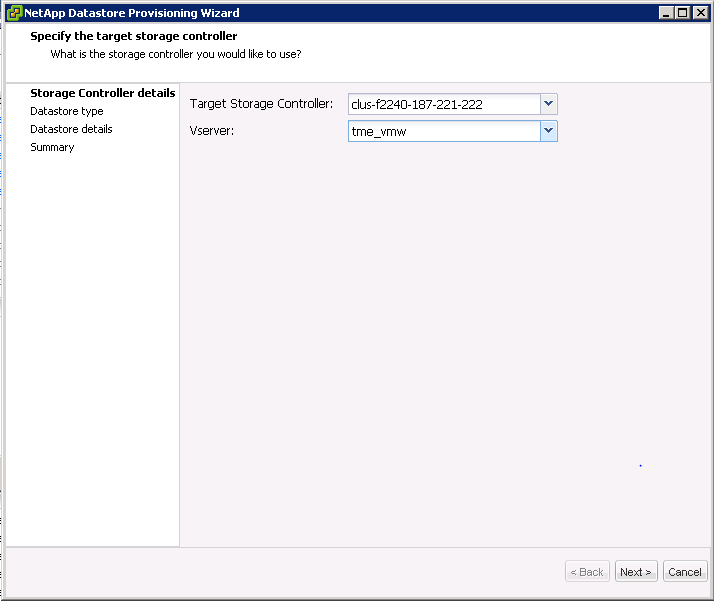
 
Select the type of datastore that you want to provision
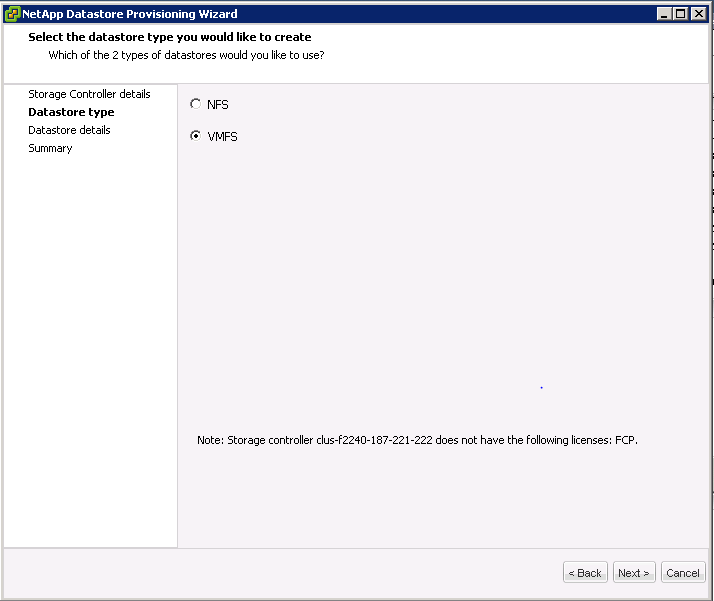
 
Consider the following while providing the datastore details:
  • Select the available protocol either FCP or iSCSI
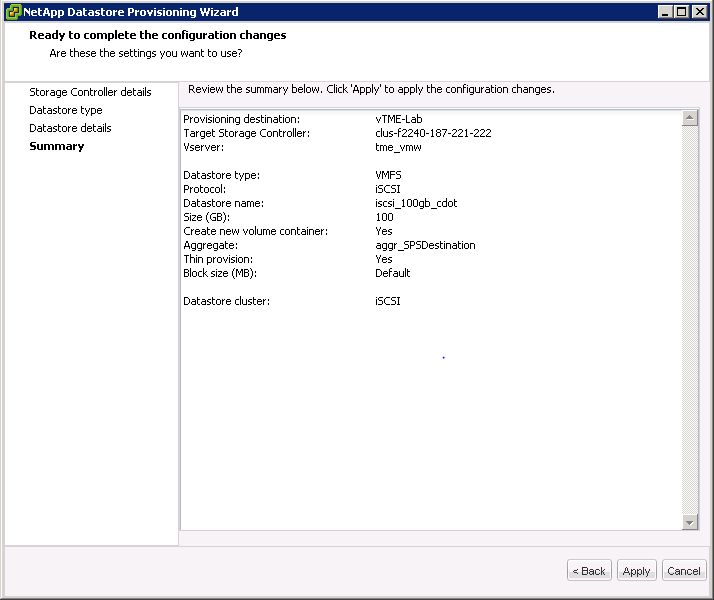
  • Specify the size in GB and provide a descriptive Datastore Name to the volume
  • Create new volume container : If you select this option a new Volume would be created in the Aggregate that you select. Note with NetApp each LUN is created inside a Volume which is stored on an Aggregate.
  • Thin Provision: Select this option if you want to create a Thin provisioned LUN
  • Datastore Cluster: Select a Datastore Cluster that is already configured in vCenter.


Review the details and click Apply to create the volume
 
VSC has automatically created the following tasks on the ESXi hosts in the cluster. Doesn’t this help? especially if you have more than 8 ESXi hosts in the cluster.
 
Demo - Mount existing Volumes
You can also use NetApp VSC to mount existing volumes.
Right Click on the specific ESXi host where you want to mount the NFS/VMFS datastore and navigate to NetApp > Provisioning and Cloning > Mount datastores.
Select the datastore that you want to mount from the list of available datastores.
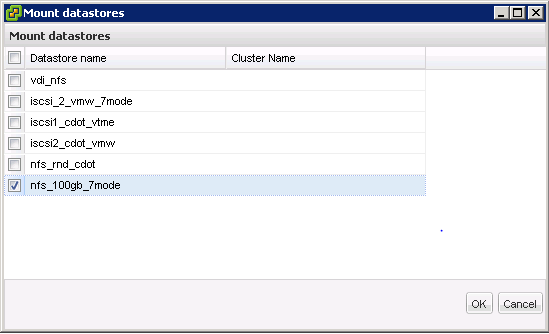
 
Click OK to mount the datastore.
From the Tasks & Events tab, you will find that the following commands are executed on the ESXi host to mount the NFS datastores.
 

Saturday, December 28, 2013

Do you use NetApp Virtual Storage Console for vSphere Infrastructure?

Welcome: To stay updated with all my Blog posts follow me on Twitter @arunpande !


In this blog post I will discuss how using NetApp Virtual Storage Console the vSphere Administrators can perform various NetApp Storage management tasks from vCenter interface. I will cover installation of VSC, followed by Registration of VSC and basic Setup. 
NetApp Virtual Storage Console is a plugin for vCenter which provides a single user interface and end-to-end management for the following tasks performed in the Infrastructure:
  • Discovery of new and existing NetApp Storage arrays, aggregates, volumes and LUNs.
  • Provisioning – Creating new VMFS/NFS volumes on NetApp Storage and mounting them to the ESXi hosts.
  • Capacity Management – Monitor the capacity of the VMFS/NFS datastores at all levels i.e. Aggregate, Volume, LUN & Datastore.
  • Backup & Recovery – Configure backup & recovery for entire datastore, virtual machine, VMDK or single files.
  • Optimization – Identify misaligned VMs or Datastores and rectify them.
  • Space Reclamation for virtual machines.
With VSC the gap between Storage & vSphere administrators can be bridged resulting in faster provisioning and other management tasks. VSC also has built in optimization settings for ESXi hosts which can applied to the ESXi hosts to reduce issues and support calls.
Install NetApp Virtual Storage Console (VSC)
Download the latest version of VSC from NetApp Support Site. Note that you need to have valid credentials to download this software. For this installation I chose x64 bit version of VSC and installed on a Windows 2008 R2 VM
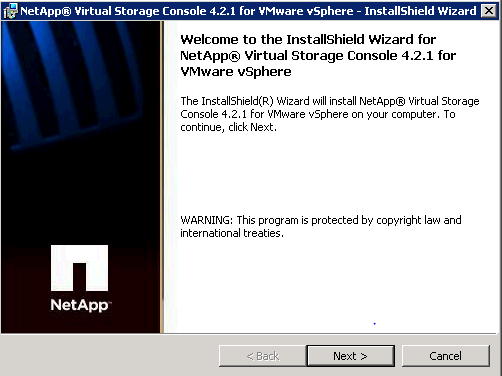
Launch the installer to start the installation of VSC and click Next to continue
 
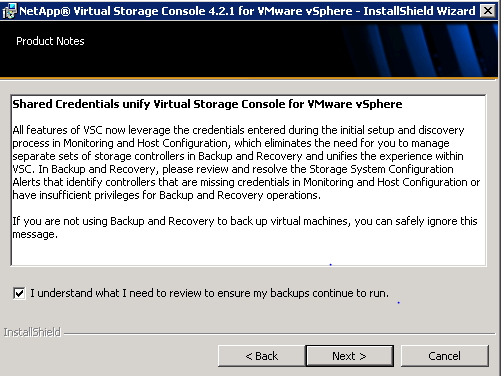
Read about the credentials required when using Backup and Recovery in VSC and click I understand to acknowledge and click Next to continue.
 
Select the capabilities of VSC and click Next to continue
 
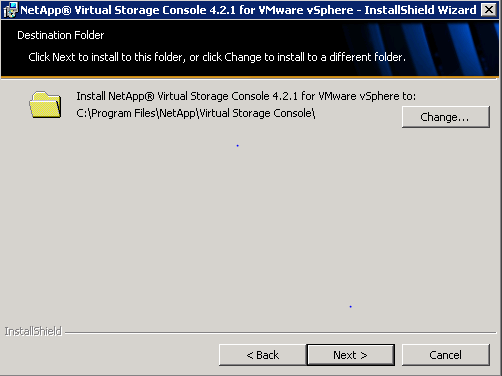
Change the destination folder for VSC installation if required and click Next to continue.
 
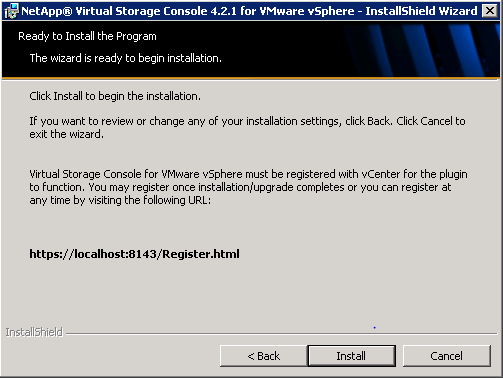
Click Install to start the installation. Note the URL provided to register VSC, this has to be done after the installation is complete.


Register NetApp VSC with VMware vCenter
Once the installation is complete a web browser would be launched to https://localhost:8143/Register.html where the following details would be required to complete the registration of VSC with vCenter.
  • Plugin service information
    • Hostname or IP Address: IP Address or Hostname of the system where VSC was installed.


  • vCenter Server Information
    • Host name or IP Address: IP or FQDN of the vCenter Server
    • Port: 443
    • User name: Use administrator@vsphere.local if you want to use the default SSO user account.  If you are using vCenter Linux Appliance use root username. If you have created an Identity source for the domain user account and also set it as default then use the DOMAIN/Username.
    • User Password: Enter the password for the above vCenter administrator username.
       
Once the Registration is complete start a new vSphere Client session to vCenter. Navigate to Plug-ins & Manage-Plugins to confirm that Virtual Storage Console plugin is enabled.
Discover NetApp Storage in VSC
Use VSC to discover any existing NetApp storage array. Once the Array is discovered you would be able to perform various storage management tasks using VSC.
To launch VSC, connect to the vCenter server using the vSphere client and navigate to Home > Solutions & Applications > click on NetApp logo
Navigate to Monitoring & Host Configuration and click on Overview > click Add to add NetApp 7 Mode or Clustered Data ONTAP storage.
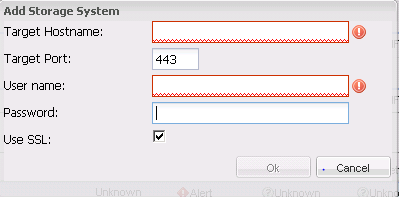
Enter the following information to add the Controller
  • Target Hostname: IP or FQDN of the 7 Mode Controller or Cluster IP in case of Clustered Data ONTAP
  • Target Port: 443
  • User  name Password: Credentials required to connect to NetApp 7 Mode Controller or Cluster IP in case of Clustered Data ONTAP.


Click Ok to add the controller.
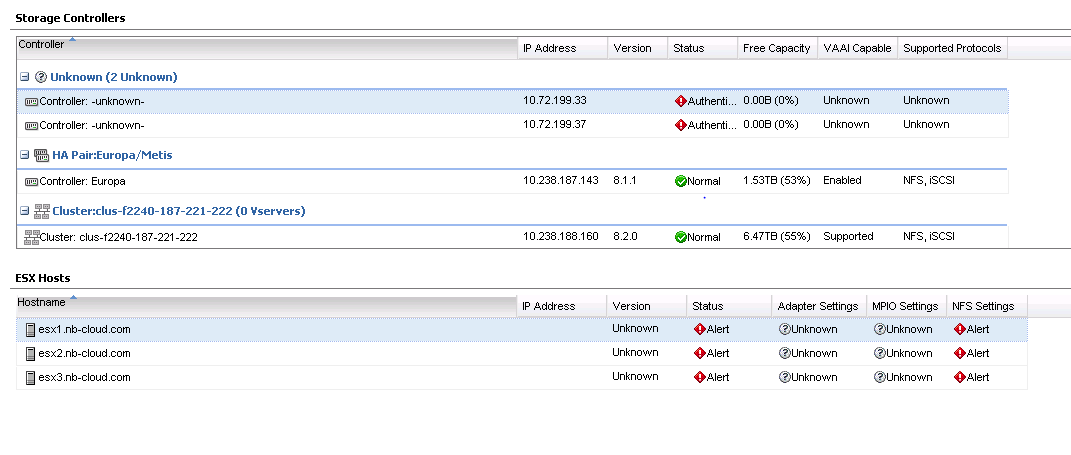
Once the controllers are added to VSC the discovered information (IP Address, Version, Free capacity, VAAI & Supported protocols) would be displayed.
 
It’s recommended that you apply NetApp best practices to the ESXi hosts for Adapter, MPIO & NFS Settings. To do this, right click on the ESXi host and click on Set Recommended Values
 
To understand the details about the settings, click on Show Details.
This completes installation and basic setup of NetApp Virtual Storage Console. You can now use VSC to also manage your NetApp Storage using vCenter Server.

Wednesday, December 11, 2013

Troubleshooting NetApp NFS VAAI Plugin on ESXi host

Welcome: To stay updated with all my Blog posts follow me on Twitter @arunpande !!
 
In this blog I will discuss some commands and logs that you can use while troubleshooting NetApp NFS VAAI plugin on ESXi host.


  • Check if NFS VAAI Plugin is installed, you can use the following command
~ # esxcli software vib list | grep -i netapp
NetAppNasPlugin                1.0-020                             NetApp  VMwareAccepted    2013-06-05


OR


~ # esxcli software vib get -n NetAppNasPlugin
NetApp_bootbank_NetAppNasPlugin_1.0-020
Name: NetAppNasPlugin
Version: 1.0-020
Type: bootbank
Vendor: NetApp
Acceptance Level: VMwareAccepted
Summary: NAS VAAI NetApp Plugin
Description: NetApp NAS VAAI Module for ESX Server
ReferenceURLs:
Creation Date: 2012-10-29
Depends:
Conflicts:
Replaces:
Provides:
Maintenance Mode Required: False
Hardware Platforms Required:
Live Install Allowed: False
Live Remove Allowed: False
Stateless Ready: False
Overlay: False
Tags:
Payloads: NetAppNasPlugin


  • If you are using ESXi CLI or NetApp Virtual Storage Console to install NFS VAAI plugin but the installation does not complete successfully, use the /var/log/esxupdate.log to find more information.


  • To troubleshoot issues related to various NFS VAAI primitives like copy offload use the /var/log/hostd.log.

Tuesday, December 10, 2013

NFS VAAI Statistics for NetApp Storage

Welcome: To stay updated with all my Blog posts follow me on Twitter @arunpande !!
 
In this blog I will discuss the NFS VAAI statistics that can be used on the NetApp storage to measure the performance and troubleshoot VAAI related issues. These statistics will help you determine if Copy Offload is being used by the Storage Array. In this blog I will cover 7 Mode and Clustered Data ONTAP.


On the NetApp Storage use the following command to monitor the NFS VAAI statistics. I have highlighted the important stats in RED throughout the blog. Note that I have deliberately removed some metrics from the output to make it more readable.


In general irrespective of the version of ONTAP, you can use sysstat –x 1 to monitor/measure the CPU, Memory, Disk, Network and other parameters. When VAAI primitives are used the Network utilization would be comparatively low compared to the disk usage because the clone & snapshots are now offloaded to the Storage Array. Hence resulting in reduced network usage between the ESXi hosts and the NetApp Storage Array. This command could give you some indication about Copy Offload and other primitives. However this may not be conclusive because there may be other workloads resulting in high network usage even when VAAI is being used. To precisely monitor the Copy Success and Errors use the following commands.


  1. Data ONTAP 7 Mode – In 7 Mode there are two commands available that can be used to view the NFS VAAI statistics.


fas2040> nfs vstorage stats
NFS COL counters are :
                    Copy Reqs: 0
                   Abort Reqs: 0
                  Status Reqs: 0
                  Notify Reqs: 0
                  Revoke Reqs: 0
                Invalid Parms: 0
       Authorization Failures: 0
      Authentication Failures: 0
              Copy Fail ISDIR: 0
            Copy Fail OFFLINE: 0
              Copy Fail STALE: 0
                 Copy Fail IO: 0
            Copy Fail NOSPACE: 0
          Copy Fail DISKQUOTA: 0
           Copy Fail READONLY: 0
               Copy Fail PERM: 0
            Copy Fail EXPIRED: 0
           Copy Fail RESOURCE: 0
           Copy Fail TOOSMALL: 0
        Copy Fail BAD STATEID: 0
              Copy Fail OTHER: 0
               Intravol Moves: 0
               Intervol Moves: 0
               Fail Space RES: 0


fas2040> nfs stat


Server rpc:
TCP:
calls       badcalls    nullrecv    badlen      xdrcall
2           0           0           0           0


UDP:
calls       badcalls    nullrecv    badlen      xdrcall
0           0           0           0           0


IPv4:
calls       badcalls    nullrecv    badlen      xdrcall
2           0           0           0           0


IPv6:
calls       badcalls    nullrecv    badlen      xdrcall
0           0           0           0           0


Server nfs:
calls       badcalls
2           0


Server nfs V3: (2 calls)
null       getattr    setattr    lookup     access     readlink   read
2 100%     0 0%       0 0%       0 0%       0 0%       0 0%       0 0%
write      create     mkdir      symlink    mknod      remove     rmdir
0 0%       0 0%       0 0%       0 0%       0 0%       0 0%       0 0%
rename     link       readdir    readdir+   fsstat     fsinfo     pathconf
0 0%       0 0%       0 0%       0 0%       0 0%       0 0%       0 0%
commit
0 0%


Read request stats (version 3)
0-511      512-1023   1K-2047    2K-4095    4K-8191    8K-16383   16K-32767  32K-65535  64K-131071 > 131071
0          0          0          0          0          0          0          0          0          0
Write request stats (version 3)
0-511      512-1023   1K-2047    2K-4095    4K-8191    8K-16383   16K-32767  32K-65535  64K-131071 > 131071
0          0          0          0          0          0          0          0          0          0


  1. Clustered Data ONTAP 8.x


NOTE: For Clustered Data ONTAP 8.2 you have to execute this command from diagnostic mode and use statistics-v1 command to get the copy_manager statistics.


To enter diagnostic mode use the following:
cluster1::> set diag
Warning: These diagnostic commands are for use by NetApp personnel only.
Do you want to continue? {y|n}: y
cluster1::*>
cluster1::*> statistics-v1 show -node cluster1-01 -object copy_manager


For previous versions of Clustered Data ONTAP use the following:


cluster1::> statistics show -node cluster1-01 -object copy_manager


Node: cluster1-01
   Object.Instance.Counter                                 Value         Delta
   ----------------------------------------------- ------------- -------------
   copy_manager.copy_stats.instance_name             copy_stats
            -
   copy_manager.copy_stats.node_name                           -             -
   copy_manager.copy_stats.instance_uuid                       -             -
   copy_manager.copy_stats.copy_success                        1             -
   copy_manager.copy_stats.copy_failure                        0             -
   copy_manager.copy_stats.copyStatus_success                  0             -
   copy_manager.copy_stats.copyStatus_failure                  0             -
   copy_manager.copy_stats.copyAbort_success                   0             -
   copy_manager.copy_stats.copyAbort_failure                   0             -
   copy_manager.copy_stats.copyCallback_success                0             -
   copy_manager.copy_stats.copyCallback_failure                0             -
   copy_manager.copy_stats.copyNotify_success                  1             -
   copy_manager.copy_stats.copyNotify_failure                  0             -
   copy_manager.copy_stats.copyRevoke_success                  1             -
   copy_manager.copy_stats.copyRevoke_failure                  0             -
   copy_manager.copy_stats.copyAuthCheck_success               0             -
   copy_manager.copy_stats.copyAuthCheck_failure               0             -
   copy_manager.copy_stats.bytes_copied                        0             -
Node: cluster1-01
   Object.Instance.Counter                                 Value         Delta
   ----------------------------------------------- ------------- -------------
   copy_manager.copy_stats.intra_vol_copy_cnt                  1             -
   copy_manager.copy_stats.inter_vol_copy_cnt                  0             -
   copy_manager.copy_stats.inter_node_copy_cnt                 0             -
   copy_manager.copy_stats.inter_clust_copy_cnt                0             -
   copy_manager.copy_stats.fail_mem_alloc                      0             -
   copy_manager.copy_stats.fail_isdir                          0             -
   copy_manager.copy_stats.fail_offline                        0             -
   copy_manager.copy_stats.fail_stale                          0             -
   copy_manager.copy_stats.fail_io                             0             -
   copy_manager.copy_stats.fail_nospace                        0             -
   copy_manager.copy_stats.fail_readonly                       0             -
   copy_manager.copy_stats.fail_authcheck                      0             -
   copy_manager.copy_stats.fail_no_resource                    0             -
   copy_manager.copy_stats.fail_other                          0             -
   copy_manager.copy_stats.intra_volume_copy_success           1             -
   copy_manager.copy_stats.intra_volume_copy_failure           0             -
   copy_manager.copy_stats.intra_volume_copyStatus_success     0             -
   copy_manager.copy_stats.intra_volume_copyStatus_failure     0             -
   copy_manager.copy_stats.intra_volume_copyAbort_success      0             -


Node: cluster1-01
   Object.Instance.Counter                                 Value         Delta
   ----------------------------------------------- ------------- -------------
   copy_manager.copy_stats.intra_volume_copyAbort_failure      0             -
   copy_manager.copy_stats.inter_volume_copy_success           0             -
   copy_manager.copy_stats.inter_volume_copy_failure           0             -
   copy_manager.copy_stats.inter_volume_copyStatus_success     0             -
   copy_manager.copy_stats.inter_volume_copyStatus_failure     0             -
   copy_manager.copy_stats.inter_volume_copyAbort_success      0             -
   copy_manager.copy_stats.inter_volume_copyAbort_failure      0             -
   copy_manager.copy_stats.inter_volume_copyCallback_success   0             -
   copy_manager.copy_stats.inter_volume_copyCallback_failure   0             -


In addition to the above command you can also check the nps1 status to troubleshoot NFS VAAI related issues.

cluster1::> system node run -node cluster1-01 -command stats show nps1
nps1:nps1:instance_name:nps1
nps1:nps1:node_name:
nps1:nps1:instance_uuid:
nps1:nps1:null_success:0
nps1:nps1:null_error:0
nps1:nps1:compound_success:0
nps1:nps1:compound_error:0
nps1:nps1:access_success:0
nps1:nps1:access_error:0
nps1:nps1:verify_success:0
nps1:nps1:verify_error:0
nps1:nps1:write_success:0
nps1:nps1:write_error:0
nps1:nps1:set_ssv_error:0
nps1:nps1:test_stateid_success:0
nps1:nps1:test_stateid_error:0
nps1:nps1:want_delegation_success:0
nps1:nps1:want_delegation_error:0
nps1:nps1:destroy_clientid_success:0
nps1:nps1:destroy_clientid_error:0
nps1:nps1:reclaim_complete_success:0
nps1:nps1:reclaim_complete_error:0
nps1:nps1:copy_notify_success:1
nps1:nps1:copy_notify_error:0
nps1:nps1:copy_revoke_success:1
nps1:nps1:copy_revoke_error:0
nps1:nps1:copy_success:1
nps1:nps1:copy_error:0
nps1:nps1:copy_abort_success:0
nps1:nps1:copy_abort_error:0
nps1:nps1:copy_status_success:0
nps1:nps1:copy_status_error:0