In my previous blog post “Do you use NetApp Virtual Storage Console for vSphere Infrastructure?”
I have provided some details about how NetApp VSC can help vSphere
administrators to perform Storage management tasks from vCenter. In this
blog post I will describe how easy it is to provision new VMFS/NFS
datastores on the vSphere hosts using NetApp Virtual Storage Console
plugin for VMware vCenter. Using NetApp VSC you can provision VMFS/NFS
datastores end-to-end i.e. on the Storage Controller and also on the
ESXi hosts using a single workflow.
How does this help vSphere & Storage Admins?
- With a single workflow you can complete the provisioning faster because now as vSphere Admins you don’t have to wait for Storage Admin to provision and present the LUNs to the ESXi hosts or create NFS volumes.
- Using a single provisioning workflow you can provision VMFS/NFS datastores to all the ESXi hosts in a cluster.
- While creating the NFS exports on the Storage the export policy and rule is created using the best practices of NetApp NFS and vSphere.
- While creating FC & iSCSI LUNs, Igroups are created automatically and the WWPN or IQN of the ESXi hosts is added automatically, resulting in reduced human error.
- It’s not limited only to provisioning new VMFS/NFS datastores, using VSC you can also mount existing datastores.
Demo – Provisioning new NFS volume
In this demo I will try to provision an NFS volume on all ESXi hosts in a cluster.
To provision NFS datastores on all the ESXi hosts in the cluster, right click on the Cluster > NetApp > Provisioning and Cloning > Provision Datastore
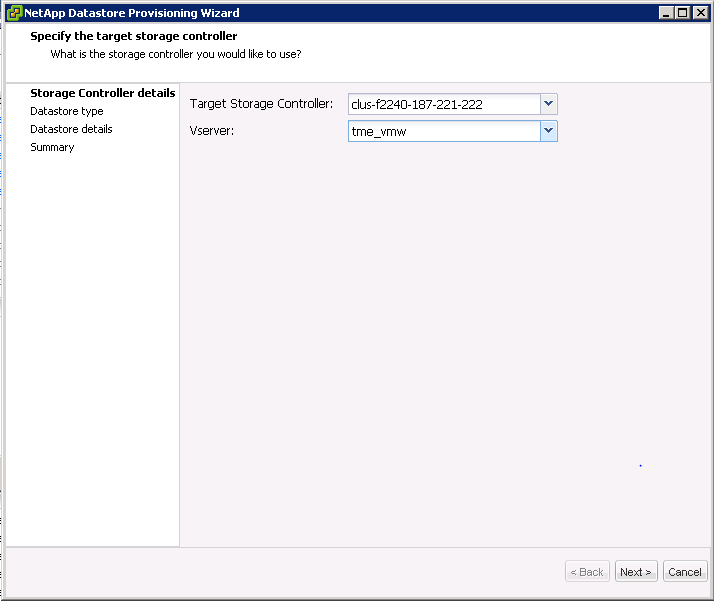
Select the vFiler (for 7 Mode) & Cluster (for Clustered Data ONTAP) from the Target Storage Controller list.

Select the type of datastore that you want to provision
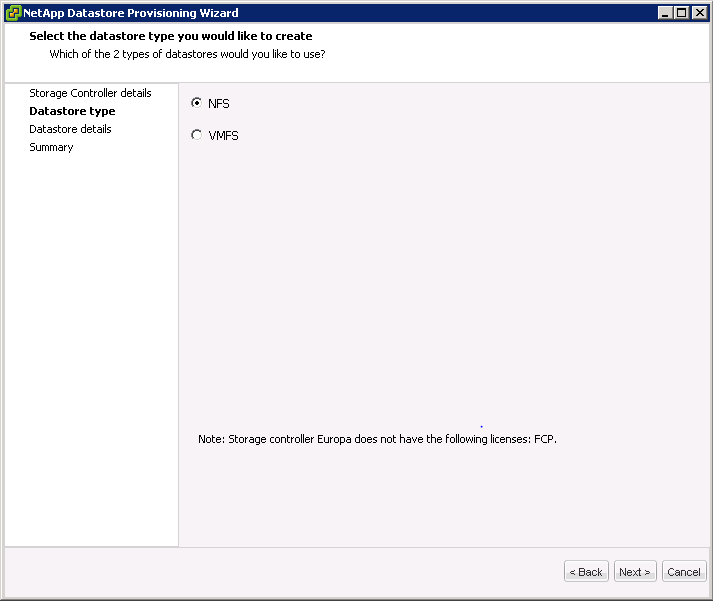
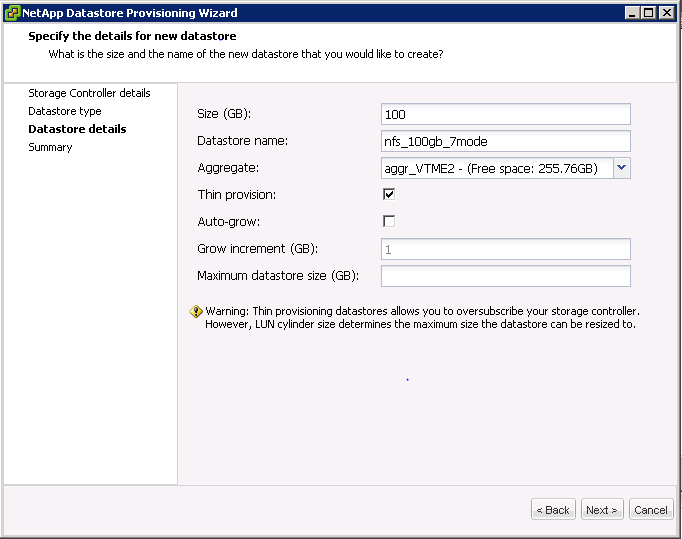
While
creating a NFS volume, you may choose any available Aggregate on the
controller that meets your requirements. You have to specify the size,
datastore name and also check Thin Provision if you want to thin
provision volumes. Alternatively you may also check the Auto-grow option
for the Thin Provisioned volumes.
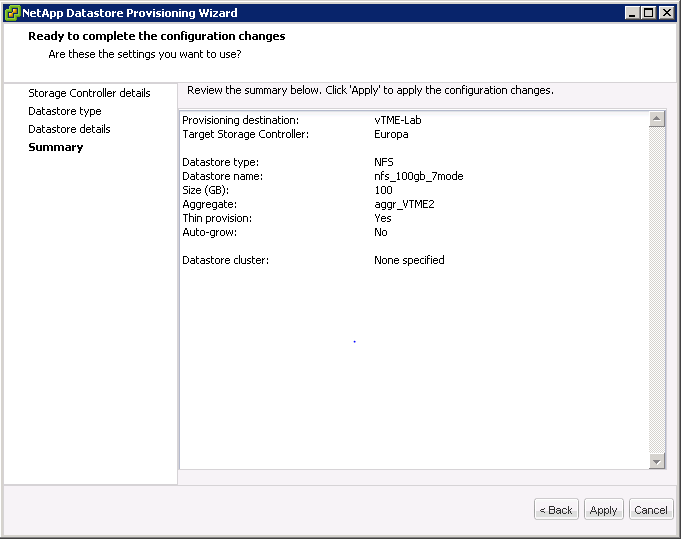
Review the details and click Apply to create the NFS datastore
While
the datastore is being created, monitor the tasks and events tab and
you will find that the volume was provisioned on the NetApp storage and
mounted to the ESXi hosts in the cluster. In this example I have two
ESXi hosts in the cluster and the volume gets mounted to the ESXi hosts
automatically. VSC has automatically created the following tasks on the
ESXi hosts in the cluster. Doesn’t this help? especially if you have
more than 8 ESXi hosts in the cluster.

Demo – Provisioning new VMFS volume
In this demo I will try to provision an VMFS volume on all ESXi hosts in a cluster.
To provision VMFS datastores on all the ESXi hosts in the cluster, right click on the Cluster > NetApp > Provisioning and Cloning > Provision Datastore
Select
the vFiler (for 7 Mode) & Cluster (for Clustered Data ONTAP) from
the Target Storage Controller list. If you select Clustered Data ONTAP,
you would also get an option to select the available Vserver from this
storage.
Select the type of datastore that you want to provision
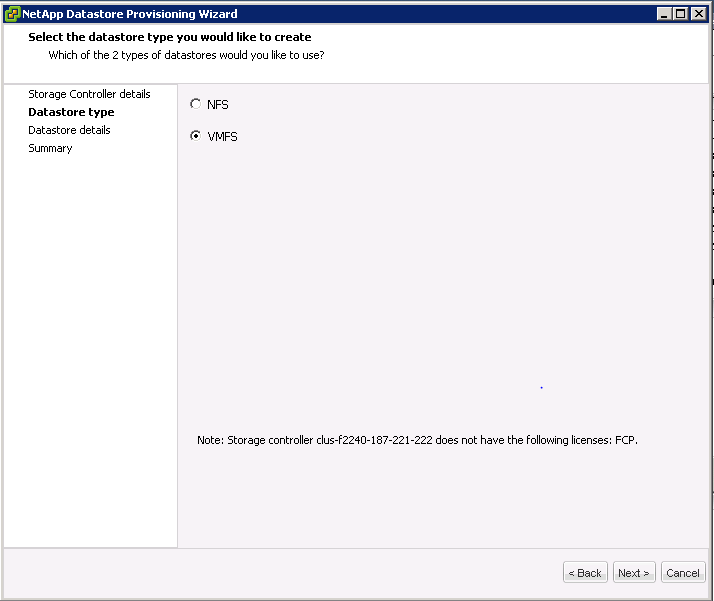
Consider the following while providing the datastore details:
- Select the available protocol either FCP or iSCSI
- Specify the size in GB and provide a descriptive Datastore Name to the volume
- Create new volume container : If you select this option a new Volume would be created in the Aggregate that you select. Note with NetApp each LUN is created inside a Volume which is stored on an Aggregate.
- Thin Provision: Select this option if you want to create a Thin provisioned LUN
- Datastore Cluster: Select a Datastore Cluster that is already configured in vCenter.

Review the details and click Apply to create the volume
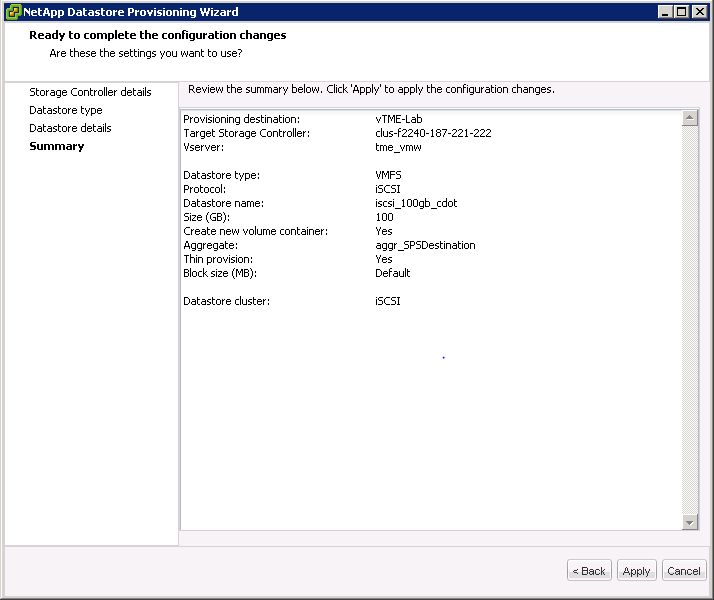
VSC
has automatically created the following tasks on the ESXi hosts in the
cluster. Doesn’t this help? especially if you have more than 8 ESXi
hosts in the cluster.

Demo - Mount existing Volumes
You can also use NetApp VSC to mount existing volumes.
Right Click on the specific ESXi host where you want to mount the NFS/VMFS datastore and navigate to NetApp > Provisioning and Cloning > Mount datastores.
Select the datastore that you want to mount from the list of available datastores.
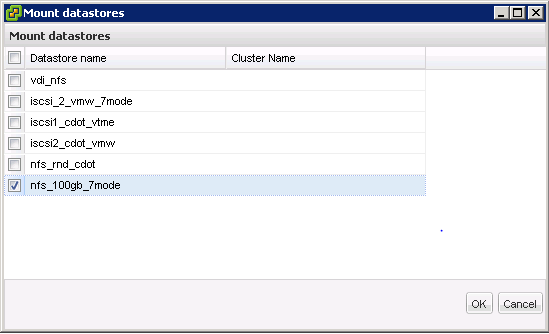
Click OK to mount the datastore.
From
the Tasks & Events tab, you will find that the following commands
are executed on the ESXi host to mount the NFS datastores.