Thursday, April 16, 2015

Troubleshooting MSDTC when vCenter Storage & Network is not detected by vRealize Automation

Welcome: To stay updated with all my Blog posts follow me on Twitter @arunpande !

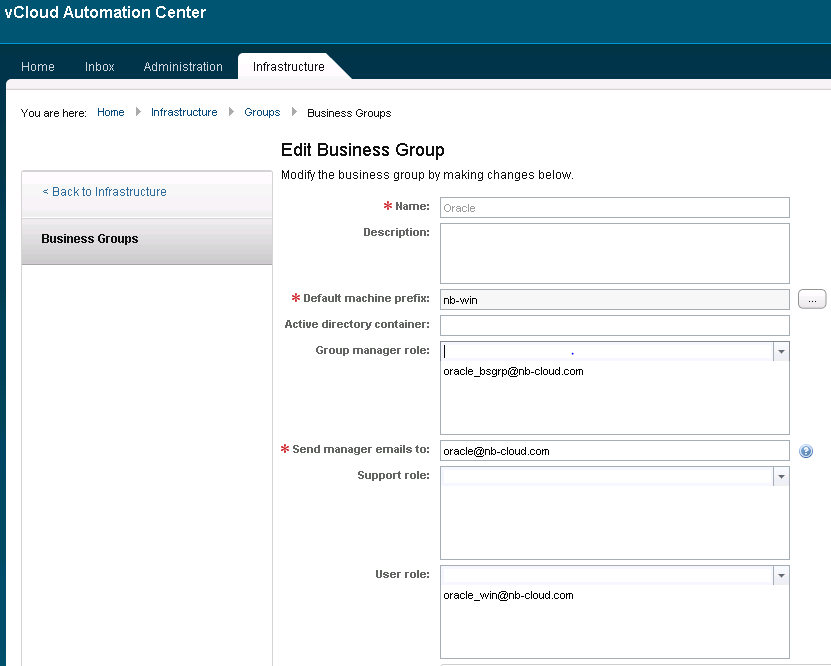
I am currently working on vRealize Automation 6.2 implementation where I have completed the distributed install. When. Post the installation I started the basic configuration where I added the vCenter server, Fabric & Business Groups.
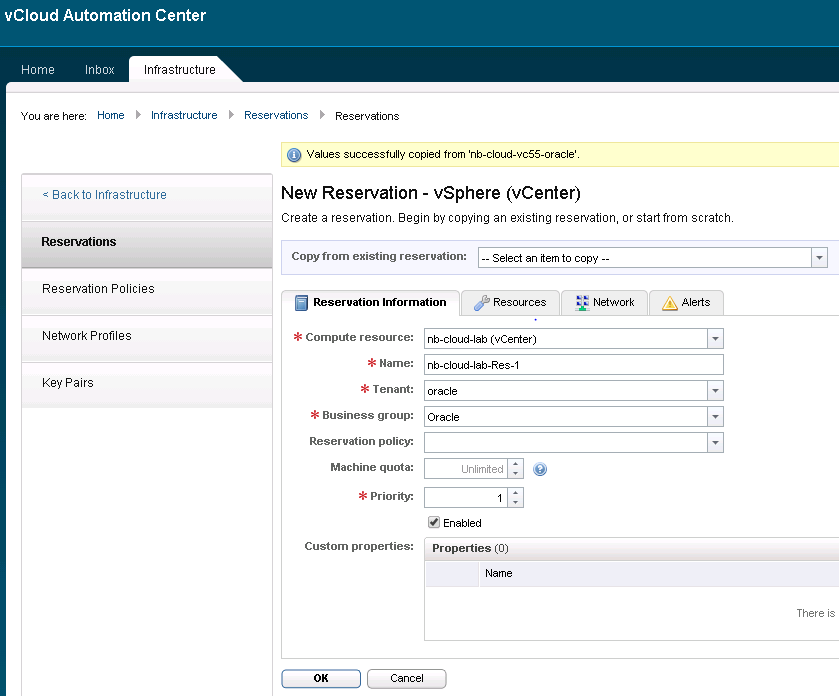
However when I was creating the reservations I noticed that the Storage & Network details were not detected. This was not new, I had faced this issue earlier but it was not an easy fix this time as the Windows firewall was enabled on the Windows database & IaaS servers and it could not be disabled.
In this blog post I would like to share the different troubleshooting steps that I have performed to troubleshoot and fix this issue.
Step 1 – Have a clear understanding about the problem statement.
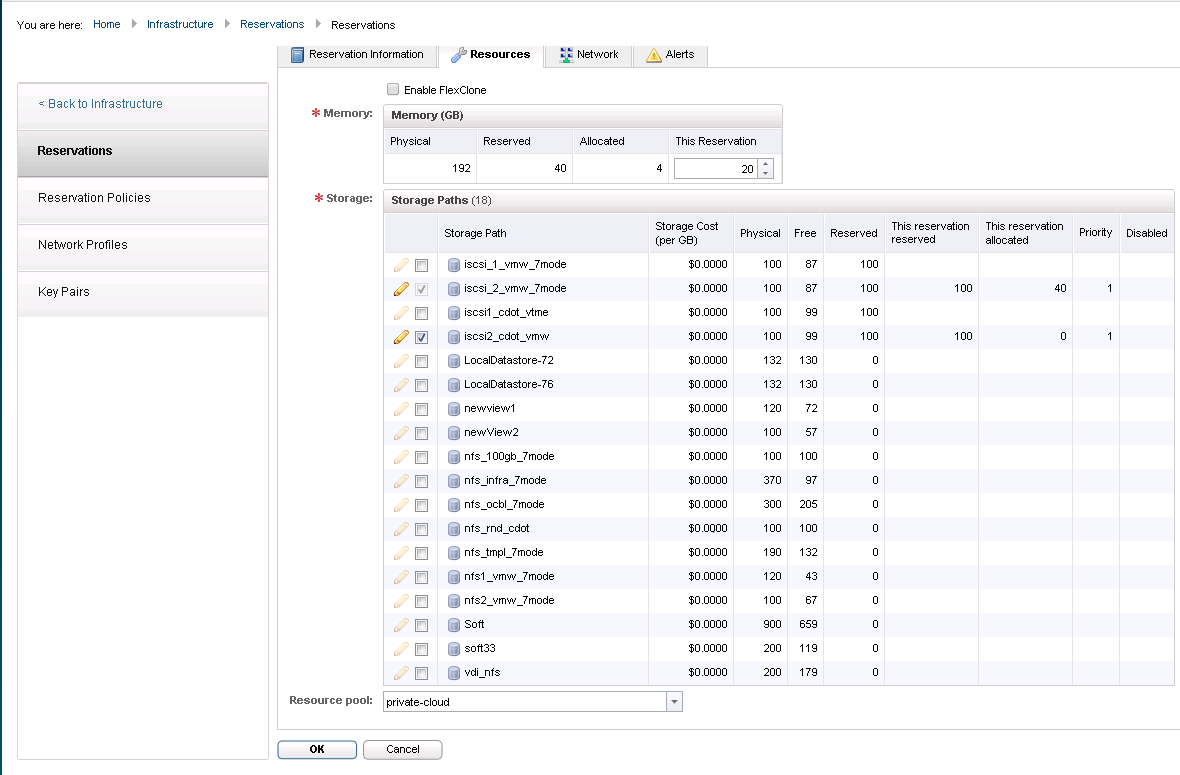
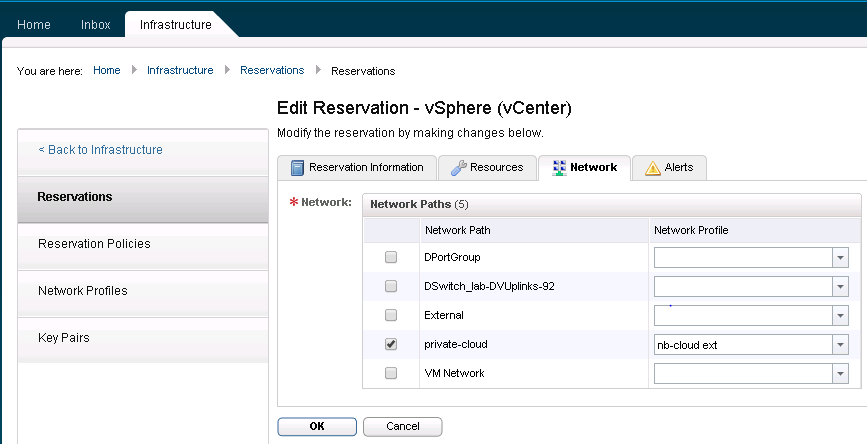
In this case the Storage Paths and Network was not detected when creating the Reservations for Business Groups.
Note that at least one data collection should be completed successfully for the Compute Resource before this data is populated in the Reservations.
Step 2 – Investigating the cause & FIX the issue
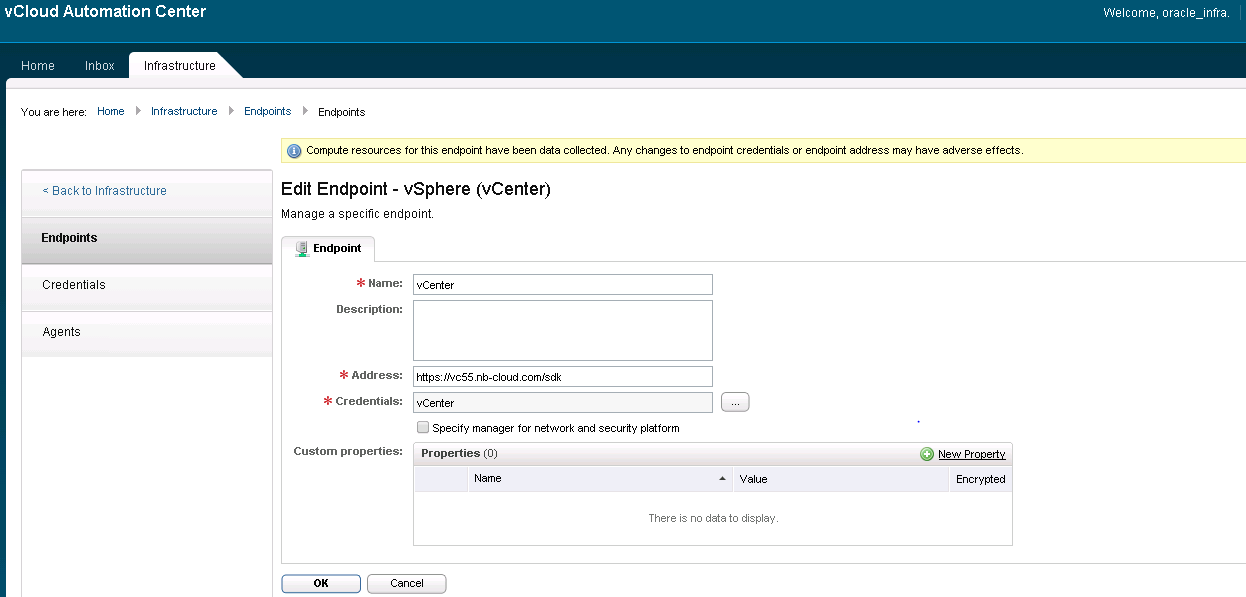
Look at the status of the vSphere Endpoint make sure that it’s OK. To confirm this, navigate to Infrastructure > Compute Resources > Compute Resource.
Next navigate to Infrastructure > Monitoring > Log to check the errors. In this case the below errors were reported.
Error
2/4/2015 7:55 PM
Manager Service
Manager Service
XXXXX
XXXXX
DataBaseStatsService: ignoring exception: Error executing query usp_SelectAgent Inner Exception: Error executing query usp_SelectAgentCapabilities
https://mycloud.vsnl.co.in/vcac/Images/icon_error.pngError
2/4/2015 7:55 PM
Manager Service
Manager Service
XXXXX
XXXXX
Error processing ping response Error executing query usp_SelectAgent Inner Exception: Error executing query usp_SelectAgentCapabilities
https://mycloud.vsnl.co.in/vcac/Images/icon_error.pngError
2/4/2015 7:54 PM
Manager Service
Manager Service
XXXXX
XXXXX
DataBaseStatsService: ignoring exception: Error executing query usp_SelectAgent Inner Exception: Error executing query usp_SelectAgentCapabilities
https://mycloud.vsnl.co.in/vcac/Images/icon_error.pngError
2/4/2015 7:54 PM
Manager Service
Manager Service
XXXXX
XXXXX
Error processing ping response Error executing query usp_SelectAgent Inner Exception: Error executing query usp_SelectAgentCapabilities


While the above errors indicate a possible issue with the IaaS database for detailed information, check the Manager Service logs that is located in C:\Program Files (x86)\VMware\vCAC\Server\Logs.
NOTE – If you have multiple servers with manager service installed, check the logs in the server which is Active. You can either check this from the Load balancer to check which node is Active or you can log into the Server and check the status of the below service, it would be running on the Active server.
Here is the snip of the errors reported in the ALL.txt file
System.ApplicationException: Error executing query usp_SelectManagementEndpoint  ---> System.ApplicationException: Error executing query usp_SelectEntityProperties  ---> System.Transactions.TransactionManagerCommunicationException: Network access for Distributed Transaction Manager (MSDTC) has been disabled. Please enable DTC for network access in the security configuration for MSDTC using the Component Services Administrative tool. ---> System.Runtime.InteropServices.COMException: The transaction manager has disabled its support for remote/network transactions. (Exception from HRESULT: 0x8004D024)
  at System.Transactions.Oletx.IDtcProxyShimFactory.ReceiveTransaction(UInt32 propgationTokenSize, Byte[] propgationToken, IntPtr managedIdentifier, Guid& transactionIdentifier, OletxTransactionIsolationLevel& isolationLevel, ITransactionShim& transactionShim)
  at System.Transactions.TransactionInterop.GetOletxTransactionFromTransmitterPropigationToken(Byte[] propagationToken)
  --- End of inner exception stack trace ---


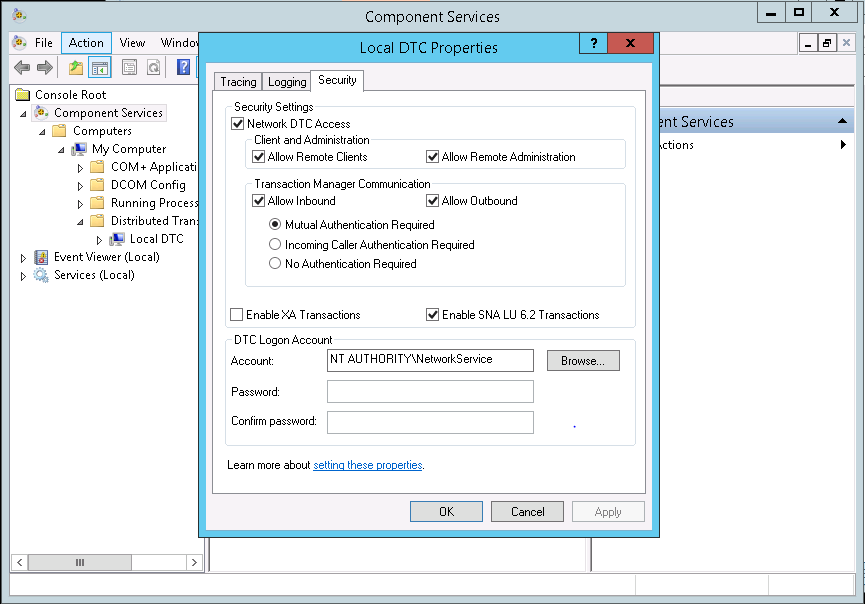
This clearly indicates that the MSDTC between the SQL Server & the Web Server was not working. However the MSDTC settings have been configured as per the vRA documentation:
The next thing I tried to do was a DTCPing from the Database Server to the Web Server. DTCPing is a tool provided by Microsoft to troubleshoot MSDTC. The tool is available for free download from http://www.microsoft.com/en-in/download/details.aspx?id=2868.
Once you have downloaded DTCPing.exe, run the installer and extract the files in a folder.


You will now see the following files in the folder after extracting the executable.

Repeat the same steps on the Web Server.
Launch the Dtcping on both servers
Sine the communication is initiated from the Web Server to the DB server enter DB server hostname in the MSDTC Simulation window launched on the Web Server
Check the status of the DTCPing command. In my case it initially received an error “RPC Server is unavailable”.  To fix the MSDTC issue, I performed the following steps:
Make sure that the MSDTC is enabled between all the servers so if you have a distributed install of vRA and have multiple Web Servers ensure that MSDTC is enabled.
There shouldn’t be any firewalls between this servers, in case there is a firewall and make sure that the MSDTC ports are open.
IMPORTANT – Disable the Windows firewall on the Web Servers & SQL Database. If this is against customer compliance and security policies you can enable the Windows firewall but create appropriate rules which allows the communication between the two host.
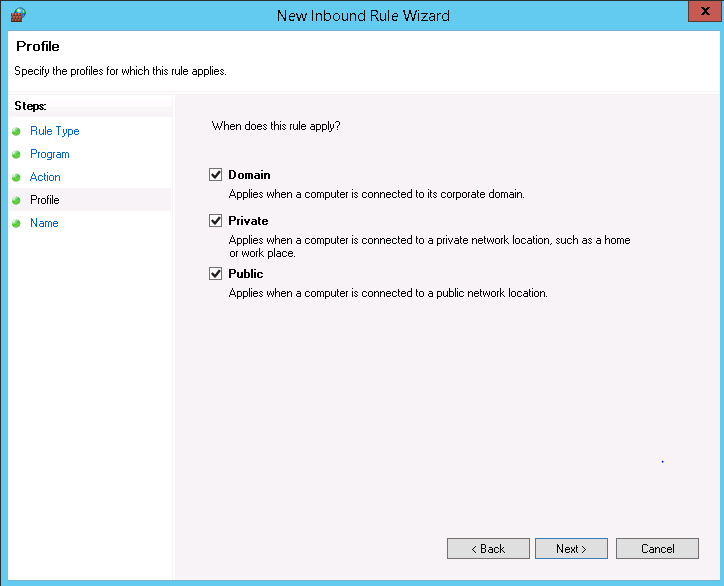
Launch the Windows firewall and click on Advanced Settings > Click on Inbound Rules and click on New Rule.
In Rule Type select Program
Enter the complete path of msdtc.exe
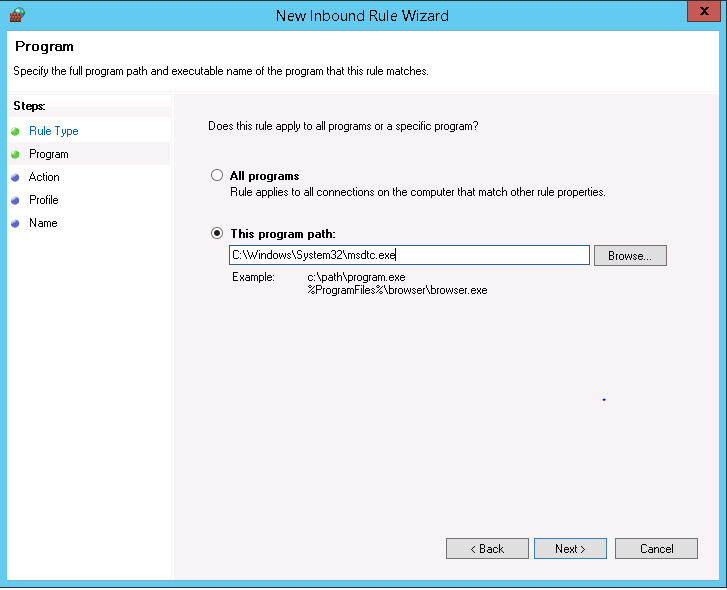
HINT – To find the location, open the task manager and click in Details
Right click on the msdtc.exe application and click on Properties
In Properties window for msdtc.exe you will find the
Now back to our firewall rule. Enter the correct path the msdtc.exe application and click Next
Click on Allow the connection and click Next
I chose the default options
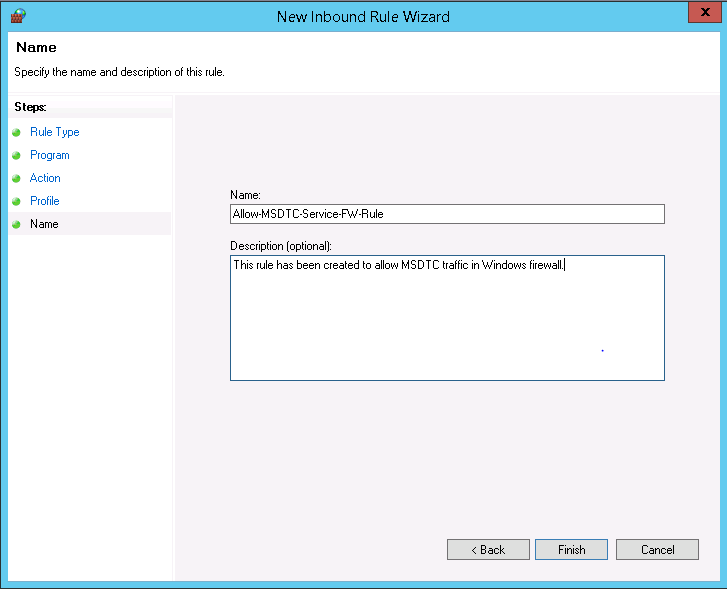
Enter a name and description of the rule and click Finish to create this rule.
Login to the server with Manager Service installed. NOTE: In distributed install, Manager Service is installed in Active/Passive mode, to check the Active node login to the Load balancer.
Restart the below service
To confirm the status, check the server logs located at C:\Program Files (x86)\VMware\vCAC\Server\Logs.
If the issue persists, perform the below steps on both the Database & IaaS Servers
  • Uninstall MSDTC from Windows Command prompt using msdtc –uninstall command.
  • Reboot the Manager Service server
  • Install MSDTC on the server using command msdtc –install from the command prompt
  • Reboot the Manager Service server
  • Make sure MSDTC is enabled as per the below screenshot

UPDATE - set the MSDTC service startup type to Automatic after reinstalling, as it defaults to manual:
sc config msdtc start= auto
sc start msdtc

Wednesday, December 3, 2014

vRealize Configuration Manager - Introduction

Welcome: To stay updated with all my Blog posts follow me on Twitter @arunpande !


Firstly, it’s great to start blogging again, was away for the past few months due to some other commitments (new job + my new born baby) but I’m happy to be back again and all set to start a new blog series on vCenter Configuration Manager. In this blog post series, I will cover the following topics:
Product Overview
  • Create an intelligent compliance management solution using vRealize Configuration Manager
  • Sizing recommendations & installation Options
  • Use Cases for vSphere Infrastructure
  • Create Compliance Rules and Remediation
  • Generate various Reports from vCM
For now, I will exclude the topics of compliance for physical infrastructure and OS patching.
In this post, let’s cover the vCenter Configuration Manager Product overview. How many of you have heard about this product in the past? I won’t be surprised if most of you say that you have not heard about VCM for various reasons. This is going to be my task for the next few days or may be weeks to share maximum information about VCM.
Let’s discuss, why vCenter Configuration Manager is a MUST HAVE for your IT Infrastructure.
All the CXOs want their IT Infrastructure to be secure to prevent any kind of security breach in their IT Infrastructure. This means one has to be aware about all those possible loop holes that may lead to this breach and one must also know how to take corrective action and continuously monitor the Infrastructure.
Following are the high level steps that one has to perform to ensure that the Infrastructure remains secure.
  • Identify the critical systems (servers, virtual machines, applications, datacenters etc.). For example all the resources in the production cluster which have business critical applications installed. For vSphere Infrastructure VMware offers hardening guides for different versions of vSphere. The VMware Security Hardening Guides can be downloaded from http://www.vmware.com/security/hardening-guides.
  • Note the different components in the above systems and create compliance & security rules. For example, create rules to ensure that SSH access to the ESXi host is disabled and used only for troubleshooting. Create rules to disable clip board copy/paste using the Virtual Machine remote console and the client system.
  • Create a process which checks for the above rules on those critical systems and identifies the non-compliant servers.
  • Perform the corrective action plan on those non-compliant servers.
  • Create a reporting mechanism which checks all the above information periodically (daily, weekly, monthly) and generates a report that can be easily reviewed.
VMware provides security hardening guides which can help you in defining rules to keep your vSphere Infrastructure secure. These Security Hardening Guides can be accessed from http://www.vmware.com/in/security/hardening-guides. Also note that there are change logs which includes the differences in two versions of vSphere.  
All the above tasks when combined together forms a Compliance and Security hardening solution. vRealize Configuration Manager makes it a lot easier to manage all the above tasks but note that it’s not limited only to compliance management you can also do OS provisioning & patching.  
vRealize Configuration Manager is part of vRealize Operations Suite and is available in Advanced & Enterprise license
For more information regarding vRealize Operations Suite license options refer to http://www.vmware.com/in/products/vrealize-operations/compare.html.
vRealize Configuration is also available in vCloud Suite for more information refer to http://www.vmware.com/in/products/vcloud-suite/compare.html.

Wednesday, April 2, 2014

Gear up to be the next vExpert, start today......

Welcome: To stay updated with all my Blog posts follow me on Twitter @arunpande !


The first batch of vExpert 2014 has been announced today and the list of vExpert 2014 can be found here. I feel honored & proud to be a part of the vExpert group and CONGRATULATIONS!! to all 2014 vExperts. 
                                                   
If you applied for vExpert 2014 but couldn’t make it, don’t get disappointed. With vExpert 2014 you can submit quarterly nominations; you will find more information here. You will get another chance when the quarterly nominations are open.
Here are some suggestions that may help you in getting vExpert 2014 during the next quarterly nominations:
Blogs – Do you blog? Maintain a blog using Blogger or WordPress and post content regularly. Do not COPY/PASTE steps (with screenshots) from VMware Documentation; your content should be helpful to the large VMware community. Include topics that you think would help others based on your experience during designing, implementation, managing or troubleshooting VMware Infrastructure. Off course you may visit my blog for reference.
This does not have to be limited to blog posts; you can also upload YouTube videos or write Whitepapers.While you can be a generalist but I would recommend specializing in a particular VMware topic/product.
Social Media – What do you use Social Networking sites for? We all use Facebook, Twitter, Google+ and other social networking sites for various reasons. Use social networking sites to share and spread the knowledge with others. Make good use of the LinkedIn Groups because this is widely used by VMware users across the globe. I have used the following LinkedIn Groups where I have posted various technical details about VMware


Technical Sessions – Do you conduct technical sessions on VMware during various events? This is another platform where you get to showcase your expertise about VMware. Start participating in events like VMUG, VMworld, vForum or events organized by your company.
Community – Do you participate regularly in communities? This is one area that I really like because you get a chance to help VMware users. There are various questions asked related to designing, implementation, managing or troubleshooting VMware. When you assist the customers and help them fix the issues you are not only rewarded with points but it’s also challenging which ensures that you don’t lose on your VMware skills. You don’t have to restrict your participation in VMware Communities, you may also participate in VMware Partner Communities. You may access my community link for reference


IMPORTANT: vExpert is all about sharing your knowledge and expertise with VMware Community. Help fellow VMware Community members succeed with the VMware solution by sharing your knowledge and expertise CONSISTENTLY. 
All the best !!

Friday, March 14, 2014

Understaing vCAC User Role by creating a end-to-end VM provisioning workflow


Welcome: To stay updated with all my Blog posts follow me on Twitter @arunpande !


If you have been following my blogs and tweets, you will find that I am exploring automation options for NetApp Storage & VMware Infrastructure. I have discussed the following topics in my previous blogs which act as a building block for this automation solution.


I haven’t included the steps required to install and configure vCAC since there are many documents/blogs already available. Assuming that you have already installed vCAC you should now be ready to explore the different features and solutions provided by vCAC.
Let’s understand the different user roles and responsibilities
available in vCAC. Here are the different types
of users available in vCAC:                                                                    
                                                                     
              
  • System Administrator
  • Windows user account to create Identity Source
  • Tenant Administrator
  • Infrastructure Administrator
  • Fabric Administrator
  • Business Group Manager
    • Support Role
    • User Role
  • Service Architects


To explain the above roles and an end-to-end provisioning workflow in I have created a hypothetical company Newbie-Cloud (a.k.a. NB-CLOUD in the rest of the blog) that is trying to implement private cloud solution using vCloud Automation Center.


Assuming that NB-CLOUD has completed vCAC setup (IDA, vCAC, IAAS, vCO) and is now ready to login here is the sequence of events using the various user accounts available.


  1. Initial Login as System Administrator
The initial login is done using the default SSO user account administrator@vsphere.local and its password that was set while configuring vCAC appliance.


  1. Create Identity Source & Tenant
Once you have logged into vCAC a default tenant “vsphere.local” is already created.  You may continue to use the default tenant to configure vCAC further or create a new one. For this example, I have created a new tenant “Oracle”. The “create new tenant” wizard also prompts you to create an identity source, where you can use an active directory for authentication. You can create Identity Source using the following options:


  • Open LDAP
  • Native Active Directory


  • Active Directory – You need a Windows User account (Login user DN) here. 


Select Tenant Administrator
 In the same “create new tenant” wizard, after creating an Identity Source, you can specify a user or group as Tenant & Infrastructure Administrator.  These users would be able to perform the respective tasks assigned to a Tennant & Infrastructure administrator. In this example I have created the following user accounts.


  1. Infrastructure Administrator Tasks (Create Credentials, Endpoints, Fabric Groups)
The infrastructure administrator now logs into the vCAC portal and has to perform the following tasks:


  • Create Credentials
Create credentials for vCenter Administrator user account i.e. administrator@domain.com & vCenter Orchestrator and other end points that you are going to use. Here is an example of vCenter Server credentials that I have created. Navigate to Infrastructure > Credentials > New Credentials


  • Create Endpoints
Create an endpoint and use the credential created in the above step for each endpoint. In this example I am creating a vCenter Server endpoint. IMPORTANT: The name “vCenter” should match what you have used while installing IaaS.


  • Create a Fabric group
The vSphere resources (Cluster, ESXi hosts etc.) discovered using the above vCenter Server endpoint can be grouped using Fabric Groups. For example, if you have two clusters in your ESXi host, you may want to assign Cluster1 to one fabric group and the second cluster to another fabric group.


In this case I have created a fabric group oracle_vc55 and assigned one of the clusters in the vCenter to this group. Note that I have assigned a different user account oracle_fabric@nb-cloud.com as the Fabric administrator.


  1. Fabric Administrator Tasks (Create Machine Prefix, Network Profiles)


AFAIK, since the resources managed by fabric administrator can be shared between tenants, it would make sense to give administrative access to a user who is not a part of a specific tenant.
IMPORTANT: It’s the infrastructure administrator that defines who the fabric administrator would be.


The fabric administrator has to create a machine prefix and network profile. This information would be used by the Tenant Administrator while creating Business Group


  • Create Machine Prefix:
Login as fabric administrator and navigate to Infrastructure > Blueprints > Machine Prefixes > New Machine Prefix


    • Machine Prefix: Enter the string value that should be prefixed for VM names deployed.
    • Number of Digits: Maximum number of digits included in the name. I chose 3 so the maximum number would be 999.
    • Next Number: This is the start number.


  • Create Network Profile:
Navigate to Infrastructure > Reservations > Network Profiles > New Network Profile


  • Create a new IP range – This IP range can be used along with the network profile.


  1. Tenant Administrator - Create Business Group
On creating Business Group you can allocate resources (in this case VMs/Blueprints, Catalog items) to a set of specific users. For example, you can give access to certain VM images only to specific users. In this example, I have created an oracle_windows business group where I will share master images for Oracle on Windows VM to specific users who would need access only to this VM.


Login as Tenant Administrator and navigate to Infrastructure > Groups > Business Groups > New Business Group


Here I am creating a Business Group named “Oracle” where I will use the VM prefix created earlier. “oracle_bsgrp” will be the business group manager and “oracle_win” would be one of the users for this business groups. Its “oracle_win” who would be have access to specific to catalogs that are published only to this group.


  1. Fabric Administrator - Create Reservations
We created a fabric administrator earlier to create VM prefix and Network profiles. This fabric administrator was also assigned while creating a Fabric Group. The fabric administrator now has to create a Reservation to assign the resources of a Fabric Group to a specific Business Group. While creating the reservation, you map the resources in a tenant with specific business group.


In this example, nb-cloud-lab is a Cluster in vCenter server. I am assigning this resource to “Oracle” tenant and business group.


Login as fabric administrator and navigate to Infrastructure > Reservations > New Reservation


In the next tab, you can define which specific vCenter resource i.e. memory, datastores, resource pools can be used by the business groups.


You can also select the desired network profile for this business group


  1. Tenant Administrator/Business Manager - Create & Publish Blueprint, Create Service.
  • Create Blueprint
Blueprint has a virtual machine (VM template or vApp) specification and it determines how this VM template would be provisioned.  When you create a blueprint you have to specify the name and virtual machine prefix. While selecting the build information all the different templates would be displayed. Select the blueprint type (server), action (clone, linked clone, netapp flex clone). I have created blueprint oracle_win2k8 by loggin in oracle_tenant. NOTE: Shared blueprint can be edited only by tenant administrator.


Login as tenant or business group manager to create blueprint. Navigate to Infrastructure > Blueprints > New Blueprint


Provide a descriptive name for this blueprint. If you chose “Shared blueprint” then only the tenant administrator can edit this blueprint.


Select one of the actions from the available list, for this example I chose “Clone” to create clones from template. The template has to select from the “Clone from” option, here you can browse existing templates in the inventory.


You may restrict specific actions for this blueprint


  • Publish Blueprint
IMPORTANT: The blueprint must be published so that it can be used in the catalog.


To publish the blueprint you can continue to login as tenant administrator or business group manager and navigate to Infrastructure > Blueprints > Blueprints > Select the blueprint and click Publish.


  • Create Service
A service is an offering that is provided to the end user, in this example I have created a service/offering to clone oracle on windows VMs. To create a service login as tenant administrator, business group manager, service architect and navigate to Administration > Catalog Management > Services > Add Service


Here you can provide the name, description, status, hours when this service would be active, users/groups for owner and support team.


Once the service has been created, you can add one or more blueprints to this service. For this example, I will add only the oracle_win2k8 blueprint that I created earlier. Continue to use the same session as tenant administrator, business manager or service architect and navigate to the service that you created in the above step. Click on the drop down under Actions and select Manage Catalog Items.


Here you can chose multiple blueprints that you want to share in the offerings. If you have a use case where you want to provide multi-tiered applications you may chose multiple blueprints in this step. For this example, I have will provide a single blueprint in the offerings. Click on + to select from the available blueprints and click on add.


  1. Tenant Administrator/Business Group Mgr/Service Architect - Create Catalog Items
As tenant administrator, business group manager or service architect you can add different services in catalogs. Catalog items are blueprints that are created earlier. Here you can add multiple services in a catalog.
NOTE: If you have a shared blueprint then the business group manager cannot add the services of that blueprint to the catalog.


Continue to use the same session as tenant administrator i.e. used to create services and navigate to Administration > Catalog Management > Catalog Items


Here you will see all the available blueprints. Click Configure under Actions to configure this catalog item


Make sure that the state is set to Active and select the service/offering that you want this blueprint to be associated with. You may also upload an image for this catalog item to make it more presentable.


  1. Tenant Administrator/Business Group Mgr - Create Entitlements
Continue to login as tenant administrator and create a group which would have access to the one or more services that you created earlier. Where entitled services = service, entitled catalog items = blueprints. I have created oracle_win_grp entitlement. Entitlement is assigned to a specific business group.


Navigate to Administration > Catalog Management > Entitlements > Click on + to add entitlements.


While creating an Entitlement, you have to select the a Business Group and note that ONLY the users and group that are part of this business group can be selected in the Users & Groups section. The users mentioned in the Users & Groups section would have access to the catalog items and services.


Click Next to go to Items & Approvals tab
Add the service that the above user should have access to


Similarly, select the catalog items


Select the Actions that the user should be entitled to


  1. Business Group Users/Manager – Request Catalog
Now let’s login as the oracle_win to see if this user has access to the catalog items. The user can now request this catalog item by click on Request.


Modify the details if required and click Submit


This will clone a new VM from template in vCenter server.


Confirm that the VM has been created in the vCenter server using the Reservation defined by the fabric administrator in Step 6


Also, using the same user session for vCAC, navigate to Items and check if the VM has been provisioned.


With this I have completed one of my longest blogs and I hope this information helps. Please leave a comment and share your feedback.